How to Plan a Basement Remodel Around Real Household Needs

Key Takeaways
- Define how the basement will solve a real need before selecting finishes.
- Address moisture, ventilation, and radon concerns before closing walls or installing flooring.
- Use flexible zones so the space can adapt as routines and household needs change.
- Plan storage, lighting, mechanical access, and safety details early.
- Confirm local permit, inspection, electrical, plumbing, HVAC, and egress requirements before construction.
A successful basement remodel does more than add finished square footage. It creates a useful extension of the home that supports everyday routines, whether that means a family room, office, guest area, gym, or play space. Homeowners in Utah Valley who want help connecting layout decisions with construction details can consult Jensen Pro Construction, a local basement remodelling contractor that provides basement renovation, home improvement, and DIY consulting services throughout the area.
The best results usually come from planning the basement as a complete system. Walls, flooring, storage, lighting, heating, and access to utilities all affect how comfortable and practical the finished space will be. Starting with the household’s needs makes it easier to make decisions that will still work years from now.
1. Start With the Purpose of the Space
Before choosing paint colors or furniture, identify the problem the remodel should solve. A growing family may need a casual gathering room. A remote worker may need a quiet office. Other households may want a guest suite, media room, teen hangout, hobby area, or exercise space.
Questions to ask before designing
- Who will use the room most often?
- Will active and quiet activities happen at the same time?
- Will guests sleep in the basement?
- Could a playroom later become a study or fitness area?
- Would a bathroom, kitchenette, or additional storage improve daily use?
2. Check Basement Conditions Before Design Work
Cosmetic work should wait until the basement is dry and stable. Watch for musty odors, peeling paint, water stains, condensation, standing water, visible cracks, or persistent humidity. Inspect gutters, downspouts, site grading, foundation walls, floor drains, and nearby plumbing for potential sources of moisture.
The EPA’s guidance for basement conversions and remodels recommends correcting moisture problems and testing for radon before a basement is finished. Test the lowest lived-in level, review dehumidification and ventilation needs, and avoid covering an active leak with drywall, carpet, or new flooring. Significant water damage or suspected mold calls for qualified professional evaluation.
3. Build a Flexible Layout
An open lower level can support several activities without becoming crowded. Define zones with furniture groupings, area rugs, bookcases, built-in storage, and separate lighting rather than adding walls everywhere. Too many partitions can make a smaller basement feel darker and limit future changes.
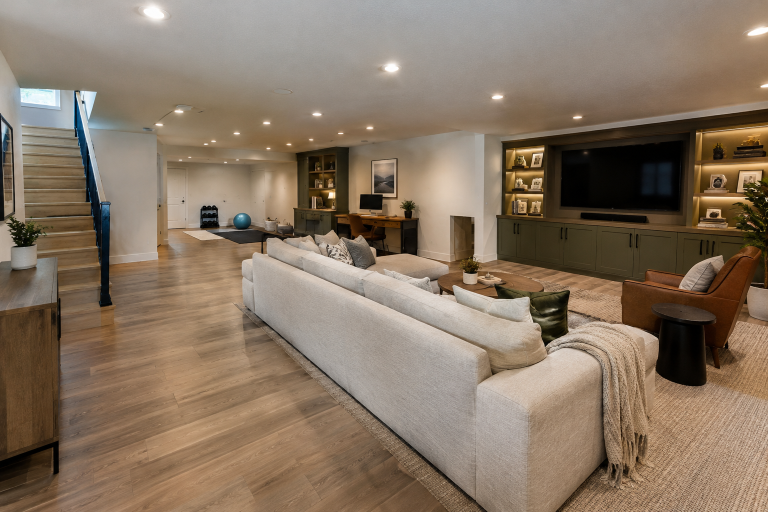
- Create a central family room with a compact desk near available daylight.
- Use a media wall with concealed storage for games, blankets, and equipment.
- Design a guest corner that can also function as a reading or study area.
- Make a children’s play zone easy to convert into a hobby room or gym later.
Keep walking paths clear, consider how large furniture will enter the space, and preserve reasonable access to mechanical equipment.
4. Plan Lighting for Comfort and Safety
Basements often need more than a single row of ceiling fixtures. A layered plan combines ambient lighting for general movement, task lighting for desks and hobby areas, and accent lighting for shelving, artwork, or a media wall. Dimmers allow the same room to support movie night, homework, and entertaining.
Plan fixture locations before walls and ceilings are closed. Brighter lighting near stairs improves visibility, while sconces, under-cabinet lights, and warm-color bulbs can make seating areas feel more comfortable. Ceiling height, ductwork, windows, and furniture placement should all inform the electrical layout.
5. Choose Materials for Basement Conditions
Material choices should reflect the condition of the concrete slab, expected traffic, and the room’s purpose. Luxury vinyl, tile, engineered wood, and carpet tiles can all be appropriate in the right setting. Flooring near a bathroom, wet bar, or other water source should be selected and installed with water exposure in mind.
Use durable, washable wall finishes in high-use areas and consider acoustic treatments for media rooms or busy family spaces. Insulation and framing details also require care. The Department of Energy’s basement vapor retarder guidance explains that poorly placed materials can trap moisture inside a wall assembly, contributing to mold or rot.
6. Include Storage From the Start
Storage helps a finished basement remain useful instead of becoming a catch-all room. Consider under-stair cabinets, built-in media storage, bench seating with hidden compartments, closed toy cabinets, open bookshelves, and a dedicated utility closet with service access.
Measure large items before construction begins. Sectional sofas, exercise equipment, mattresses, desks, televisions, and storage bins can affect door widths, outlet placement, room dimensions, and the best location for built-ins.
7. Review Systems, Safety, and Egress
Plan electrical, plumbing, HVAC, and access needs before framing. An office, theater, freezer, or gym may need dedicated circuits. A future bathroom or wet bar needs a practical plumbing route. Finished space also needs heating and cooling capacity, and enclosed bathrooms need appropriate exhaust ventilation.
If a bedroom is planned, emergency escape and rescue requirements may apply. Local building departments set the final rules for permits, inspections, room use, electrical work, plumbing, HVAC changes, and egress. Maintain access to shutoff valves, cleanouts, furnaces, and other serviceable equipment.
8. Create a Practical Budget and Timeline
A basement budget should account for conditions discovered after demolition. Organize the estimate into water control, repairs, design and permits, framing, insulation, mechanical work, drywall, ceilings, flooring, paint, built-ins, fixtures, furniture, and technology. Include a contingency for unforeseen issues.
Ask for an itemized scope rather than relying on a broad online price range. Clarify allowances, change-order procedures, payment stages, cleanup responsibilities, inspection coordination, and the expected sequence of work.
9. Choose the Right Remodeling Partner
Compare professionals on more than the lowest bid. Look for relevant basement experience, licensing and insurance documentation, a clear written scope, examples of completed work, communication expectations, and familiarity with moisture management and permit processes. A detailed proposal makes it easier to compare what each contractor is actually including.
10. Use a Final Basement Remodel Checklist
- Define the basement’s primary purpose and likely future use.
- Check for moisture, mold, ventilation, and radon concerns.
- Review ceiling height, windows, stairs, and mechanical equipment.
- Choose a layout with clear traffic paths and adaptable zones.
- Plan lighting, outlets, storage, and plumbing before walls are closed.
- Select finishes suited to the basement’s conditions.
- Confirm permits, inspections, egress, insurance, and project communication.
- Keep contingency funds available for hidden conditions.
Basement Remodel Final Thoughts
A thoughtful basement remodel should support real life, not simply follow a trend. By addressing moisture and safety first, designing for flexibility, and coordinating systems with finishes, homeowners can create a lower level that feels comfortable, practical, and ready to serve changing needs over time.